Overview
VIDIZMO understands and is committed to providing customers with a secure and reliable content delivery experience. The importance of safeguarding your content from unauthorized access, and we have taken proactive steps to address this concern. To mitigate potential security risks, such as unauthorized access through browser network sniffing or other similar methods, we have implemented Azure's Token Authentication (SAS) within the VIDIZMO platform.
With this approach, content URLs are accessible for a limited time interval, as configured within your portal. Once the defined time elapses, the content URL automatically becomes inaccessible, adding an extra layer of security. In such cases, the application requests a new token from Azure to extend access to the content further.
By implementing Azure CDN with SAS, VIDIZMO demonstrates its commitment to ensuring the highest levels of security, performance, and user experience for content delivery.
This is what we have implemented using Azure CDN with SAS. Here's an overview of the measures we've implemented to achieve this:
- Token Authentication (SAS): VIDIZMO leverages Azure's Token Authentication (Shared Access Signature - SAS) to control access to content URLs. This mechanism generates time-limited tokens that grant access to specific content for a predetermined interval. After the designated time, the token expires, rendering the content URL inaccessible. The platform requests a new token from Azure to continue accessing the content.
- Limited Time Access: With SAS, content URLs are accessible for a restricted time frame. This feature curtails the window of opportunity for any potential security breaches that may arise from unauthorized interception of URLs. The dynamic expiration of tokens ensures that content remains secure.
- Azure Content Delivery Network (CDN): To optimize content delivery and enhance security, VIDIZMO is integrated with Azure CDN. This accelerates content distribution while maintaining high levels of security. When you set up Azure CDN for content delivery, VIDIZMO configures Azure CDN Token Linking URLs (TLU) by default. This streamlined approach aligns with security best practices.
- Token Refresh Mechanism: When content is accessed through VIDIZMO, the platform proactively refreshes tokens as they near expiration. This seamless token refresh mechanism guarantees uninterrupted access to content for authorized users without requiring manual intervention.
- Scalability and Performance: By implementing SAS with Azure CDN, is designed for scalability and high performance. It can efficiently handle content delivery to many users, ensuring a seamless experience even during periods of high demand.
Prerequisite
- Only Manager+ can configure Azure Storage with VIDIZMO On-Premise/cloud Encoder using Setup Wizard in a Portal.
- In your Azure portal, the user whose credentials you use to configure your Azure Storage should have an Owner or Contributor role in the subscription under which you create your storage account.
- Make sure the user is part of a single Active Directory Tenant. To learn more about Azure tenant, Single tenant, and multi-tenant, see Terminologies in Azure AD.
Note: Your previous content will remain intact and will be served from your pre-configured storage provider unless you choose to migrate data. In case of data migration, old content is copied (not moved) to the new content storage.
Azure Configuration
Following are the steps to be performed in Azure Portal before you run the Setup Wizard:
1. In your portal, the user whose credentials you use to configure your Azure Media Services storage account should have an Owner role in the subscription under which you create your storage account.
Here is how you can do it:
- Go to Azure Subscriptions and check your role and permissions. It should be an Owner.
- If not, this is how an administrator can assign you the role of administrator of the subscription.
2. Additionally, Multi-Factor Authentication settings against that user should be turned off. Here is how you can do it:
- Disable MFA from the Azure portal for the specific user whose credentials you will be using for setup.
3. Make sure the name you use to create your Azure Media Service and Azure Storage is not the same as a recently deleted media service or storage account in your Azure portal.
4. Get the Subscription ID of the subscription under which you will create your Azure storage account, go to Azure Subscriptions and copy the ID of your subscription. This ID will be later used while configuring storage via Setup Wizard.
VIDIZMO Configuration
Accessing the Portal's Homepage
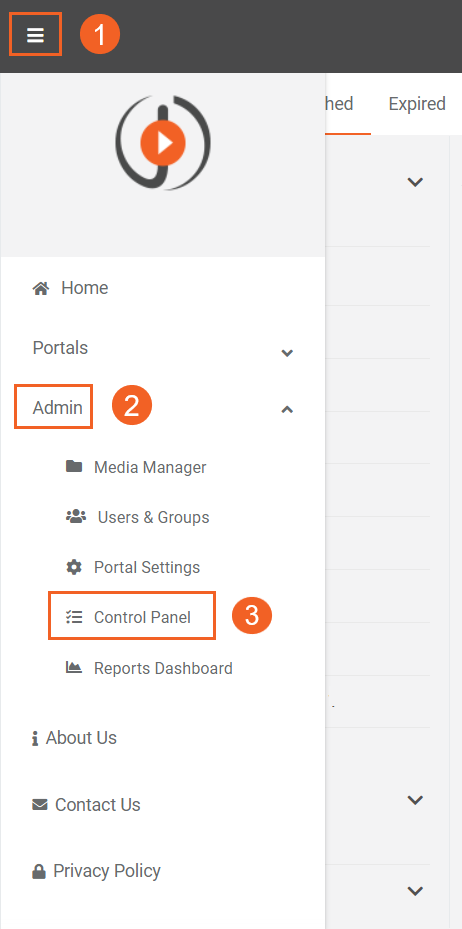
- Log into the Portal and click the Menu icon in the top left-hand corner to open the left navigation pane.
- Expand the Admin section by clicking on the down arrow.
- Click on Control Panel.

4. From the manage Portal navigation pane in Control Panel:
5. Click the Setup Wizard tab to open the corresponding screen on the right-hand side.
6. Click on the “Run Wizard Again” button.

7. Select Azure to configure it as your VIDIZMO Storage for your system from a list of available options in the drop-down.
8. Select VIDIZMO On Premise Encoder to configure it as your Encoder for your system from a list of available options in the drop-down.
9. Click Next to proceed to the next tab.

From the Storage tab
10. Select Global as the Subscription Type. To learn more, see: Azure Government and Azure Globa.
11. Copy the ID of your account on Azure as Login ID. This is the email address with which you signed into your Azure portal.
12. Enter the Password that you use to sign into the portal using the above email address.
13. Enter the ID of your subscription package in Azure as a Subscription ID. To learn more about it, see: Azure Subscriptions and How can I retrieve my Azure subscription ID?
14. Enter the name that you want to set as Storage Name for your storage account in Azure. This name must be globally unique.
15. Enter the name that you want to set as the Resource Group Name for your resource group in Azure, where you will organize your storage and media service together. This name must be unique within your Azure subscription. To learn more about it, see Resource groups.
16. Select the physical location for your Azure servers from a list of available options in the drop-down as Location. To know more about which location would suit your needs, see: Azure regions.
17. Select “Replication”. Having Geo-Redundant Storage enabled, your data is durable even in the case of a complete regional outage or a disaster in which the primary region isn't recoverable. For more information about available replication options, see Storage replication options.
18. Enable Blob Private Access (by default, VIDIMZO enables it)
19. Provide the content URL expiry time. (by default, VIDIZMO sets its value=15 minutes)
20. Select the “CDN SKU” Profile configured on your Azure CDN Account with various privileges associated with each account.
21. Click “Next” to proceed to the next tab.
To learn more about the different options, see: Compare Azure CDN Product Features.
Note:
For “Standard_ChinaCdn” you must register a separate subscription to use Azure CDN China, and your websites need to have an ICP license. See more https://learn.microsoft.com/en-us/azure/cdn/cdn-china-delivery
For "Standard_Akamai" Azure CDN from Akamai is unavailable for Pay-as-you-go subscriptions. See more https://learn.microsoft.com/en-us/azure/cdn/subscription-offerings
“Custom_Verizon” Azure has removed custom_verizon sku from the offered sku's and not allowing to create rules using API https://learn.microsoft.com/en-us/azure/cdn/cdn-features
 From the Transcoder tab
22. If you want to transcribe video and audio automatically, then enable another option other.
23. Enable the “Migrate Content” option to migrate content to CDN with SAS.
24. Click Done.

Note: After creating storage, VIDIZMO creates the following 3 containers
“et-[TenantId]”; for all the mashups related contents (original video, its rendition, vtt etc.) with access level=Private
“et-[TenantId]”-scorm; for storing all the scorm files with access level=Public
“et-[TenantId]”-tenant; For storing all the tenant data like
Portal logo, b/g image, banner, and header
User profile image
Category logo, b/g image, banner, and header
with access level=Public

SAS Token Mechanism for Content Serving
Here's how the SAS token mechanism works in the context of content serving:
- Resource Access Request: Mashup search call requests access to a specific resource, such as a video, image, or document, hosted on a server or storage account.
- Token Generation: The server generates a SAS token that encapsulates certain access permissions, an expiration time, and other optional parameters.
- Token Appending: The generated SAS token is appended to the resource's URL, creating a signed URL that includes the necessary access information. This URL, with the attached SAS token, is then provided to the user for accessing the content.
- Access to Resource: The user uses the signed URL to access the resource. The server checks the validity of the SAS token before granting access to the requested resource.
5. Time-Limited Access:
- The SAS token has an expiration time, which defines how long the URL is valid.
- Once the token expires, the URL becomes inaccessible, providing an additional layer of security.
Example: See when previewing/playback any mashup-related content, then the application initiates a mashup search call to fetch the SAS or content access token, and this will be appended with the content URL to serve the content.


Note: After the Expiry time configured in portal storage, application initiates mashup search call automatically/dynamically to fetch the token and again append it with the URL for smooth and reliable serving.
Update SAS Expiry
Accessing the Portal's Homepage
- Log into the Portal with Manager Plus and click on the Menu icon in the top left-hand corner to open the left navigation pane.
- Expand the Admin section by clicking on the down arrow.
- Click on Control Panel.
Navigating to the Setup Wizard
4. From the manage Portal navigation pane in Control Panel:
5. Click the Storage Provider tab to open the corresponding screen on the right-hand side.
6. Click on the edit option against the storage provider/record that serves mashup contents (audio, video, image, document and closed caption).

7. Click the continue button to proceed.

8. Within the "Content Access Token (Expiry)" field, please provide the token's expiration time in minutes. This duration determines the accessibility period for downloaded content through the SAS token.
9. Click Update to save changes.
